COLOR PSYCHOLOGY PROJECT – RTB*
Students should note that this is a sample assignment. Instructors may alter its contents, and referring to the materials given directly by the instructor will always be the most accurate.
OBJECTIVES
- Demonstrate competency with video editing software.
- Develop an understanding of sequence and time.
- Utilize color psychology concepts found in color theory.
- Develop an understanding of narrative and non-narrative form.
THE ASSIGNMENT
The Assignment:
For this assignment you will consider color psychology and pick a color scheme that reflects the emotional response intended for the viewer. The video can be in narrative or non-narrative form, and needs to utilize a storyboard for planning the sequences of your shots. The purpose of this project is to use communicate through the use of color in a sequential medium such as video. Here are the specific parameters:
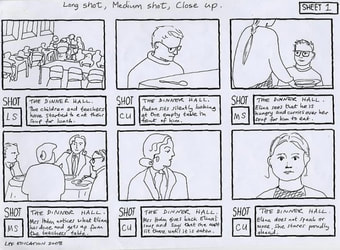
- Start with a storyboard. See the specifics for the storyboard on the second page of handout.
- A successful work, warranting a high-grade, will link specific color/s and the semester’s theme in a compelling way. Please avoid clichés.
- You will use all original footage, no samples or stock videos from others.
- The video should be between 1 to 2 minutes in length.
- The video must include multiple shots edited together with a simple title sequence at the beginning.
- The video will have sound.
- *Please do not video anything extreme or disturbing to your classmates. Ask me if you have questions.
VOCABULARY
- Storyboard
- Sequence
- Edited Time
- Linear Narrative
- Nonlinear Narrative
- Duration,
- Color Psychology
THE STORYBOARD
Step 1 – Take an image from each scene/transition that will be in the video art piece. (These are just mock-ups they don't have to be accurate).
Step 2 – Print images 4"x6" or smaller in B/W with low contrast and brilliance, the image should look washed out, but you should be able to recognize the basic forms in the composition. Print at least three copies of each image.
Step 3 – Using color pencils, watercolor, markers, etc. add color to change the feeling of the scene.
Step 4 – Arrange the final scenes on a sheet of paper.


